Now that all four walls of the main floor had been sheeted, I was eager to get things moving to frame our loft. A co-worker with experience in construction had suggested I sheet the walls prior to framing the second floor and roof. He said this would give rigidity to the structure and help to tie the studs together. That makes sense, but I also knew that OSB degrades when exposed to the elements. The race was on.
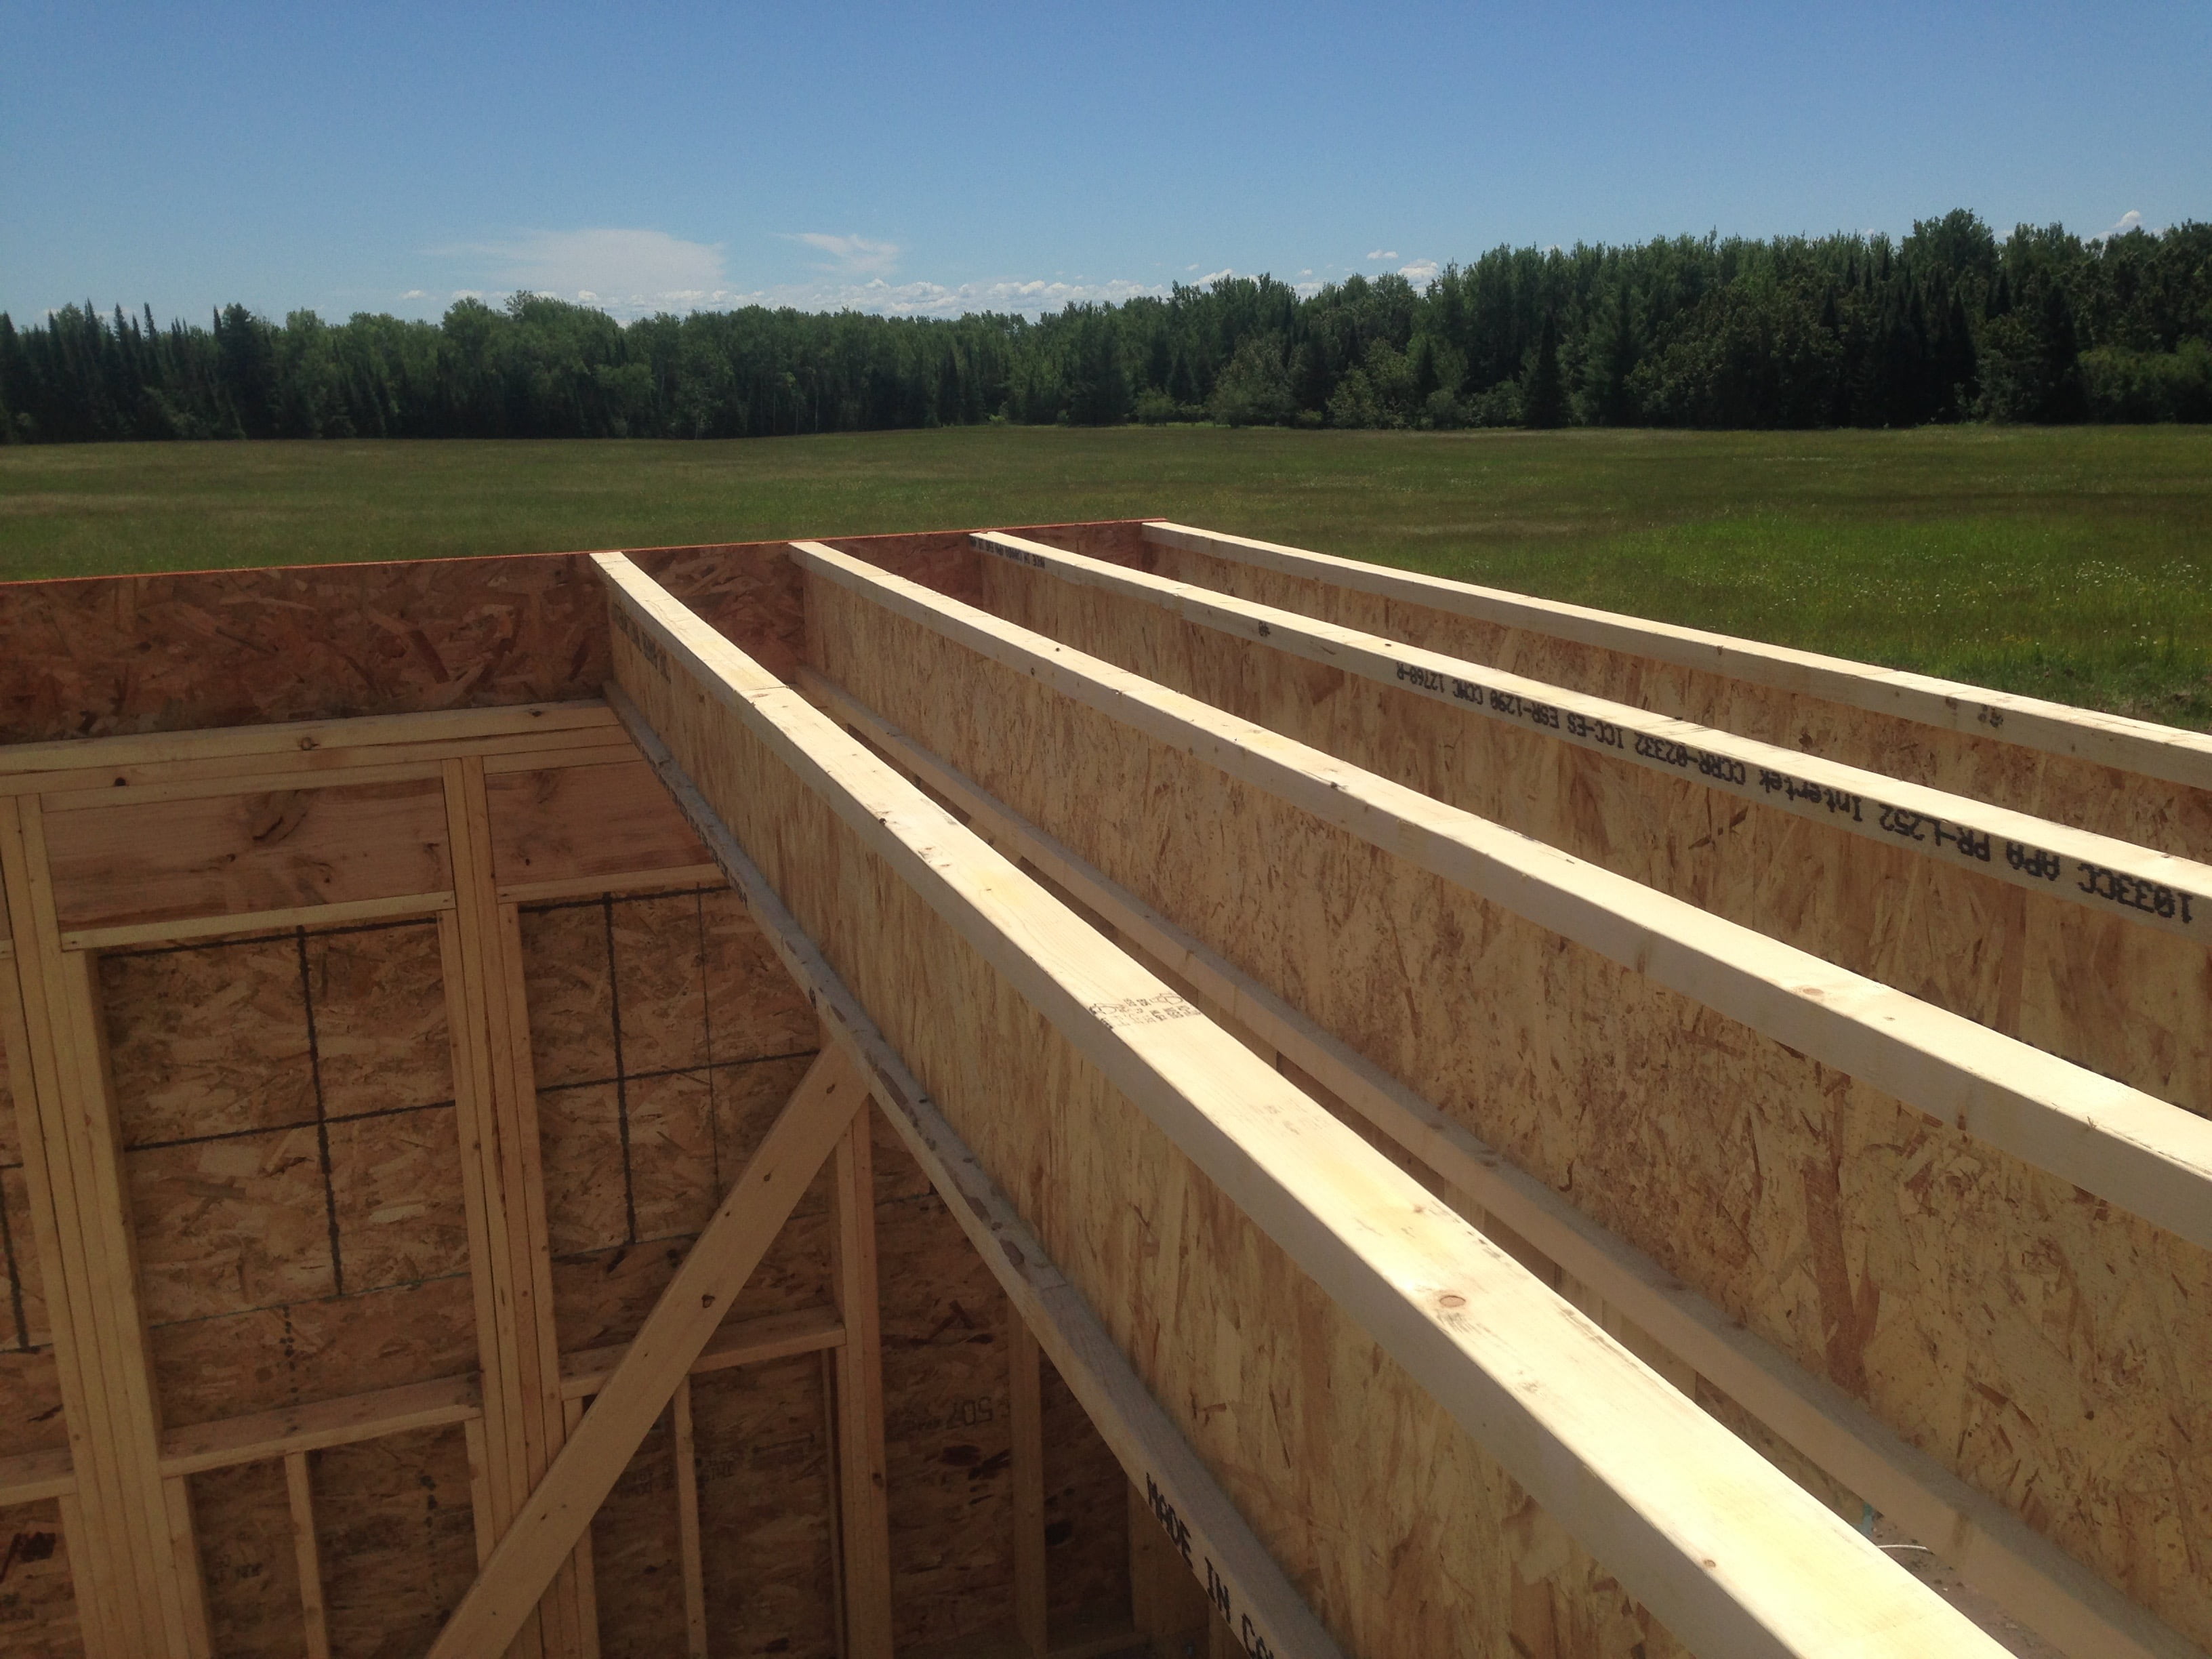
I was lucky to have Bre with me on Day 5, as we needed to start framing the loft. Our loft consists of a 12 foot floor covering the entire width of 20 feet. After 4 feet, the loft width recedes to 16 feet for the remaining 8 feet. This is to allow an opening for the staircase.
The 20 foot i-joists are supported on either end by the top sill plate of the exterior stud walls. In order to support the terminated end of the 16 foot i-joists, we had to frame a support beam to expanse the 8 feet, and support that with posts. Originally I had designed these beams and posts to be 4×4 cedar. While I’m certain they would meet the load requirements, I made an audible at this point.
In framing our covered porch we used 6×6 rough cut cedar. The extra heft of these timbers made the 4x4s look minuscule in comparison. We decided to opt for matching 6x6s inside as well. This is where it came in handy to have extra hands.
Our main ceiling is 8 feet high, so the posts had to be that minus the width of the i-joists and the beam supporting it (roughly 16 3/4”). On the ground, we laid out the positioning of the beam on top of the posts and bolted them together with construction grade t-plates. Now that all three pieces were secured, the weight was substantial and lifting it was no short order.
Not only that, but we also had to place the beam/post component square to the wall, and in the right location to have the shorter i-joists terminate upon it. Now, a smarter man probably would have laid this out. But I’ve never been accused of being smart.
 Instead, we opted for simplicity. By standing up the beam/post component and laying out the i-joists upon it, we were able to move the beam/post component into position based on the end length of both the first and last i-joist in sequence. This, along with squaring the component to the wall, afforded me the relative confidence that it was in the right position. (It still is).
Once the beam/post component had been placed, all we had to do was hoist the i-joists into position and secure them into place. We only had time to place half of the i-joists, but it was rewarding to see progress being made overhead. That, and the trellis effect of the i-joists finally gave us some relief to unending sunshine (which now seems like a boon).