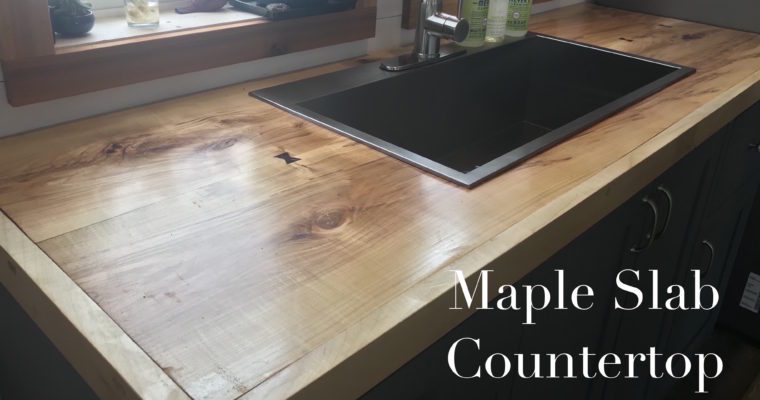
As soon as we started talking about building our kitchen cabinets I envisioned a bookmatched slab of some species for the countertop. We ended up choosing maple because the sawmill had it in stock, it fit our required dimensions, it was a good price, and it had a cool story.
A few years back when we had that massive wind storm we were still living in town. Trees were down everywhere, and it was chaos. That happened the week before I started framing the house. Often, Bre would encourage me to take a few days off from building to go gather trees people were putting out at the curb. Had this occurred any other time than when I had just started building we could have had substantial pile of material for the eventual sawmill.
Alas, I did not. I was too eager to build, too ambitious to finish the house. That said, we did try to get a log on a few occasions. On one such instance, we found a maple tree listed on Craigslist that had come down in the storm. It was three blocks from our house, so we went to take a look. By the time we had gotten there it was already gone. Flash forward 2 years and we come to find out that the guy at the sawmill had grabbed it before we could. So, now that tree is a part of our new house in our countertop.
As far as the countertop construction goes, it was fairly straightforward. Since we wanted to bookmatch the slab, we ripped it to the width we needed while preserving the mirror of the joint. Once the two slabs had been jointed and glued into one big slab we could cut the final widths from the outside of the slab and also cut it to length.
There was a pretty significant twist in this log, and since we were bookmatching the slabs it would appear at offsetting corners of the slab. The only way to remove this twist was during the flattening. In order to flatten the slab, I had to go and buy a router and make a flattening sled to run over the slab. It worked well with a straight bit, but due to the twist we lost almost half of the thickness in places.
I was concerned that having a thinner countertop would both look silly and be weak, so to remedy that we used a 3/4″ piece of plywood as a substrate and then fashioned an apron around the front edges to cover the plywood. This gives the appearance of a thicker slab. In order to attach the apron to the countertop, I drilled pilot holes and countersunk them to screw the apron to the countertop. In the front this is no big deal and we could fill the holes in after screwing with some plugs cut from the offcuts of the countertop. In the end grain where we screwed the side apron, we had to provide slotted pilot holes to allow for wood movement.
We’re super pumped to finally be done with this project. It’s been weighing on me for a few months now, so it’s a relief to be finished. Washing dishes in a functioning sink is taken for granted, and it feels great to be able to do that again.
Please help us by sharing this content!