I picked up this Cub Cadet HDS2135 earlier this summer at an auction. I spent around $134 to acquire it, which is generally more than I like to pay for riding lawnmowers. However, Cub Cadets generally retain their value pretty well, and it looked more or less complete. Let’s see what we found out.
Initial Reaction to HDS2135
My initial reaction when I picked up this HDS2135 was a bit of disappointment. In the auction listing, the machine appeared to be complete and the photos were taken with the tires aired up.
I quickly realized that this was not the case. When I went to pick up the machine, three of the tires were flat. That made loading the lawnmower a bit more difficult.
I prefer to load riding lawnmowers into the back of my truck. Since this machine didn’t roll too well on one tire, I more or less had to manhandle it up the ramps and into the bed. Thankfully, another auction participant helped me load it when he saw me struggling (thank you, kind stranger).
When I got this Cub Cadet home, I just took a preliminary look at it to ascertain its condition. Aside from the tires needing assistance, I found that it had last been run a decade ago. The battery was from 2007 and was, no doubt, shot.
I did check and confirm that the engine was free and would turn over. The seat was torn in a few places, but it was in overall decent condition.
After that, it was some time before I could actually find the time to work on this HDS2135.
Tools Used (Commissions Earned)
Diving in to the Repairs on the HDS2135
The first thing I wanted to repair was the tires. It’s a bit dark in my shed where I was storing the machine, so in order to make for good videos, I wanted the ability to easily move the machine in and out when I was working on it.
This presented me with my first dilemma. How to go about repairing the tires?
As I mentioned, three of the four tires were flat. All three had pretty deep cracks from sitting. The front two tires were not that big of a deal as they were a standard 15×6-6. However, the rear tire was an odd size – 20×9-8.
This size of tire is seemingly no longer made. I could opt for a different size, but then I would have to purchase a new tire for the other rear (the good one) in order for them to match.
The other option was to simply put tubes in the tires. The problem with this choice is that the cracks were fairly significant and I had my doubts as to whether or not the tubes would be sufficient.
Since it would be around $175 for a complete set of new tires vs. $35 for the three tubes, I opted for just getting the three tubes.
This machine originally retailed around $1800 in 1997. I’ve seen this same model sell for $300-$800 depending on the condition.
My hope was to sell it for $600. Since I already had $134 into it, and I knew that the expenses would add up for basic maintenance, I didn’t think there was enough profit margin to risk purchasing a new set of tires.
In the end, the tubes held really well, and I’m glad that I opted for this route.
Assessing the HDS2135 Engine
Now that I had the machine rolling, the next step was to assess the engine. As I mentioned, it was not seized and did spin freely on my initial inspection. I checked and confirmed that it did have oil, although it was pretty low.
That being said, the frame of the machine had a significant amount of caked oil and debris, and I suspected an oil leak somewhere.
I topped off the machine and proceeded on.
I threw the battery on the charger for a few days, but it would not hold a charge. That isn’t unexpected considering the age, but that also increases our expenses for a new battery.
In order to continue the assessment, I was able to attach the jumper pack to the leads in order to attempt starting the machine without a battery.
I assessed the spark plug and found it to be in generally good condition. By applying a small amount of fuel into the spark plug hole and then reinserting the spark plug, I was now able to attempt starting the lawnmower.
Luckily, it coughed and fired pretty quickly. At this point, I was convinced that it would run and I was more comfortable with the idea of spending money on fluids and filters.
Continuing the Repairs
After purchasing the required fuel filter, engine oil filter, fluids and a battery, I was able to perform some routine maintenance as I had no idea of the last service interval.
Prior to doing so, I gave the machine a good bath with the pressure washer. This made it easier to identify if and where it was leaking oil, and it helped keep me cleaner while working on it.
Unfortunately, I just was not able to pinpoint any source of a leak. As there was considerable oil remnants, I was certain that there was a leak – I just needed to locate it.
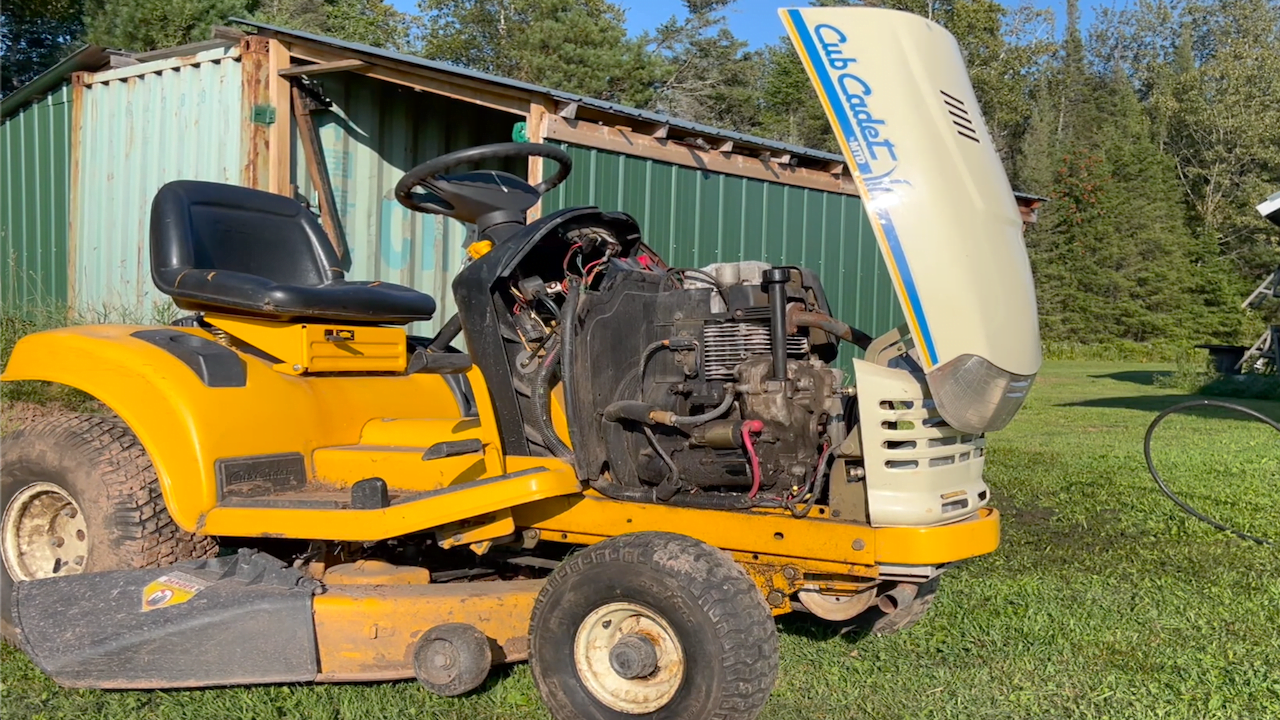
I opted for tearing the engine out of the machine in order to give it a more thorough cleaning.
This was pretty simple to do. There’s the grounding cable, starter cables, choke and throttle linkages, engine mount bolts, and the drive shaft holding it in place. Once those were removed I was free to lift the engine off and give it a good cleaning.
Even after all that work, I was still unable to locate the source of any leak. I decided to reinstall everything, top it off with fresh fuel, and then let it sit. Since the machine was now clean, it would be easier to identify the source of the leak.
After several days of sitting, there still wasn’t any identifiable leak. So, perhaps I haven’t located it yet, or it only shows up when the machine is running and under pressure. Or, it’s quite possible that there is no leak and someone simply spilled oil when filling it.
Assessing the Deck and PTO
In order to make removing the engine easier, I decided to remove the deck as well. This gave me a good chance to assess it. All of the spindles were in decent condition. There was no play in the blades which is indicative of good bearings. The deck itself had surface rust, but there were no holes blown through it.
However, the PTO would not engage. I bypassed the switch and ran leads directly to the battery. This test confirmed the PTO did work, but there’s a problem in the wiring. I replaced a relay as it was found to be faulty, but the electrical problems continued.
As the PTO is several hundred dollars to replace, I’m glad that it tested in working condition. However, I still need to track down the source of the problem. It could be that the PTO switch is faulty, or there might be an inadvertent ground somewhere.
Current Condition of the HDS2135
Unfortunately, I ran out of time to complete the repairs on this machine. As fall came and went, the market for riding lawnmowers quickly evaporated. In order to turn a profit on this riding lawnmower, I’m going to have to wait until spring to list it.
The last day that I worked on this machine was spent winterizing it and performing some small, final tasks.
I removed the fuel and greased all the fittings that I could find. Initially, none of the fittings would take any grease as they had been caked in dried, old grease.
I picked up this slick grease rejuvenator, and that helped me clean out the old grease to apply some fresh grease into the fittings.
During my initial assessment, I was having a difficult time accessing the carburetor bowl. I inspected the fuel tank and found that it was empty. I mistakenly assumed that the carburetor would be clean.
After performing my maintenance, I could no longer get the machine to run. I suspect that the carburetor does need a thorough overhaul, and my plan is to do that in the spring.
Recap
This riding lawnmower has been a fun machine to work on. After repairing the tires, performing some routine maintenance and assessing electrical issues, there’s still a bit more work to do.
I need to do a carburetor overhaul in the spring, as well as continuing to work on the electrical system. I’m confident that I can get these issues ironed out. I’d just rather work on it when the weather is getting warmer instead of colder.
As an Amazon Associate I earn from qualifying purchases.
3 thoughts on “Cub Cadet HDS2135 – Riding Lawnmower Repair”